1.6 Text and Annotations
Part I - Simple text
Sometimes we might be interested in not only generating geometry but also in generating textual information that goes along side it and helps understand it better. Knowing how to annotate an architectural drawing is thus a crucial step when producing technical documentations for publishing or plotting. As we will see during the course of this tutorial, Rosetta provides some functions that allows us to do this.
The first function we will look at is
text
. This function simply produces, in the CAD tool, a piece of written text. It receives as
parameters a string* containing the text we wish to reproduce, the text insertion point and the text
height.
> (text "This is a line of text."
        (xyz 0 6 0)
        1)
#<text 0>
> (text "And this is another."
        (xyz 0 4 0)
        1)
#<text 1>
> (text "Creating text is easy!"
        (xyz 0 2 0)
        1)
#<text 2>
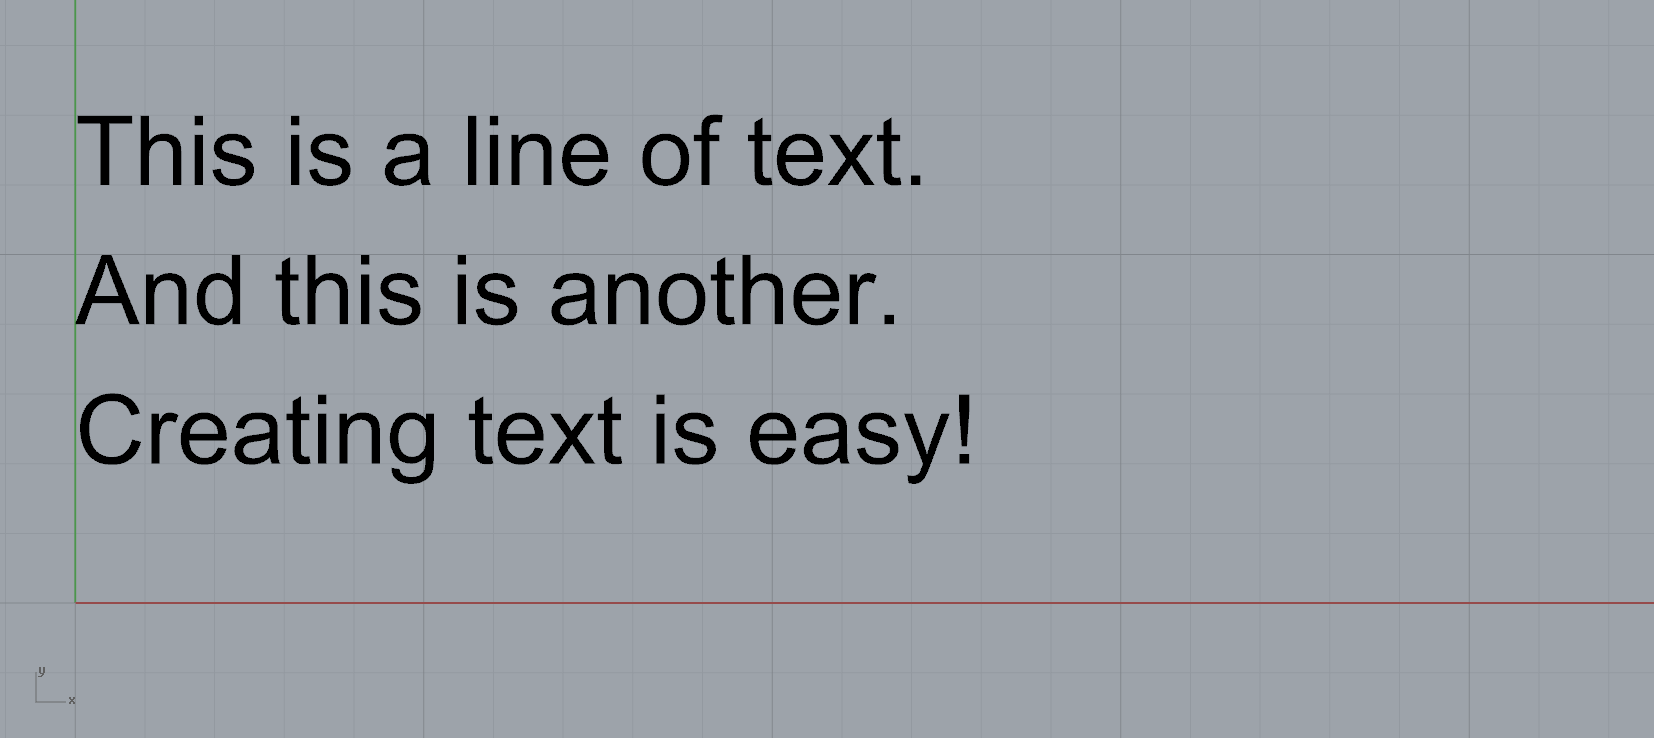
FIGURE 1 | Three strings of text
One thing we need to have in mind is that since double-quotes are used by
the Racket syntax to specify a string we cannot use double-quotes inside our strings. For example,
if we wanted to produce a line of text saying: "Did he say: "Creating text is easy?""
we would be met with an error since the second double-quotes is used to close the string
"Did he say: " leaving the remaining text Creating text is easy?"" behind.
To get around this problem, Racket provides many different "escape" characters. Probably the simplest one is
to place a dash \ before the double-quotes. This way we can now write:
> (text "Did he say: \"Creating text is easy?\""
        (xyz 0 0 0)
        1)
#<text 3>

FIGURE 2 | A piece of text with quotes
If instead of creating a line of text aligned on the left we wanted to place
text centred, we can use
text-centered
. The syntax is absolutely the same as before with the only different that the text will be centred relative
to the insertion point.
> (text-centered "O O O O O O" (y 0) 1)
#<(text-centered text) 1>
> (text-centered "O O O O O" (y 2) 1)
#<(text-centered text) 3>
> (text-centered "O O O O" (y 4) 1)
#<(text-centered text) 5>
> (text-centered "O O O" (y 6) 1)
#<(text-centered text) 7>
> (text-centered "O O" (y 8) 1)
#<(text-centered text) 9>
> (text-centered "O" (y 10) 1)
#<(text-centered text) 11>
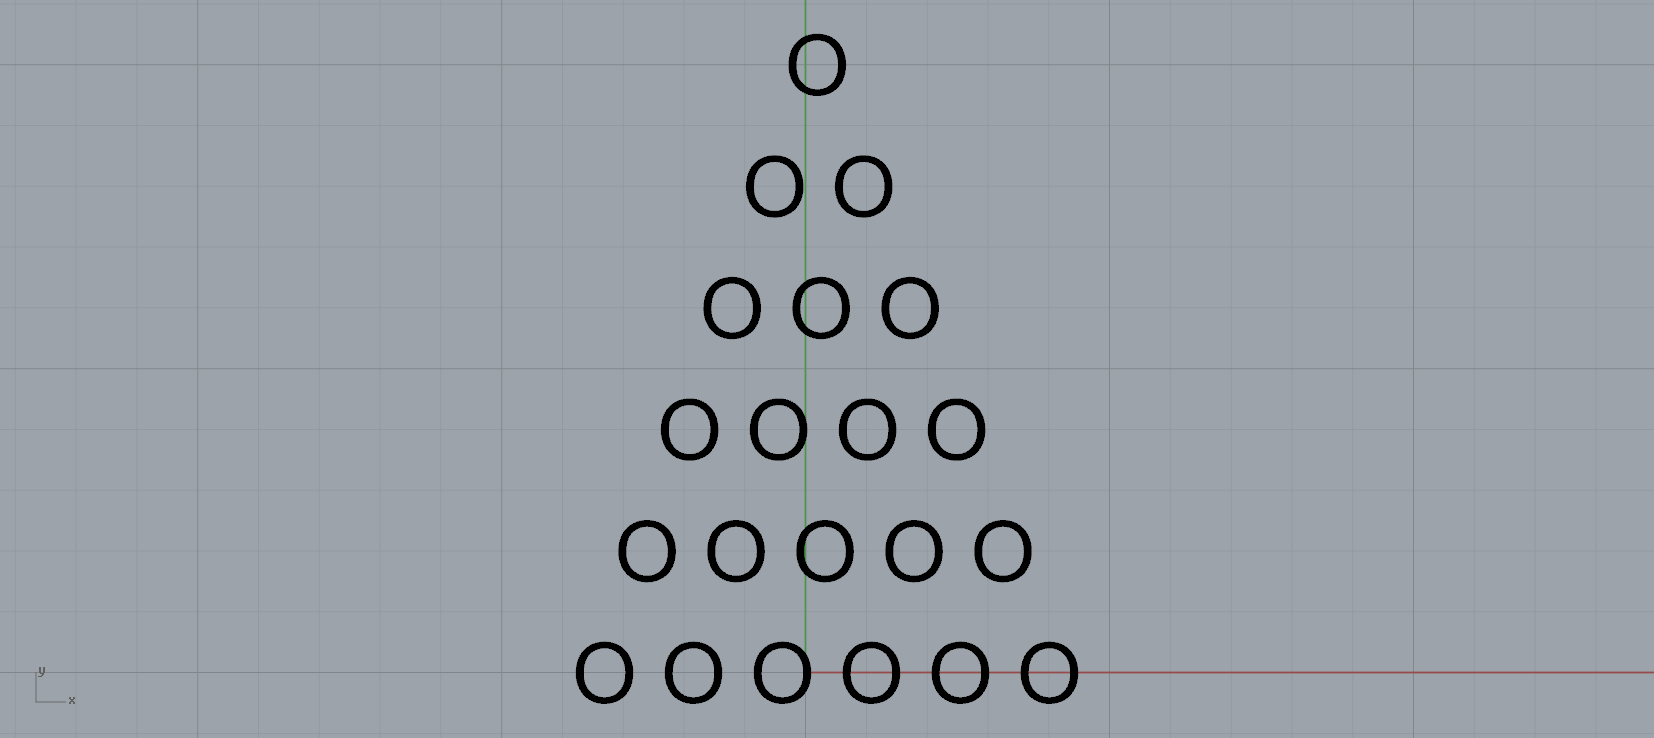
FIGURE 3 | Lines of centred text
Part II - Parametrized text
We can also create textual information that is parametric, but in order to do so we need
a way of inserting a parameter inside a string. The form
format
allows us to do just that. For example:
> (text (format "How much is 1+1? ~a." (+ 1 1))
        (xyz 0 0 0) 1)
#<text 0>
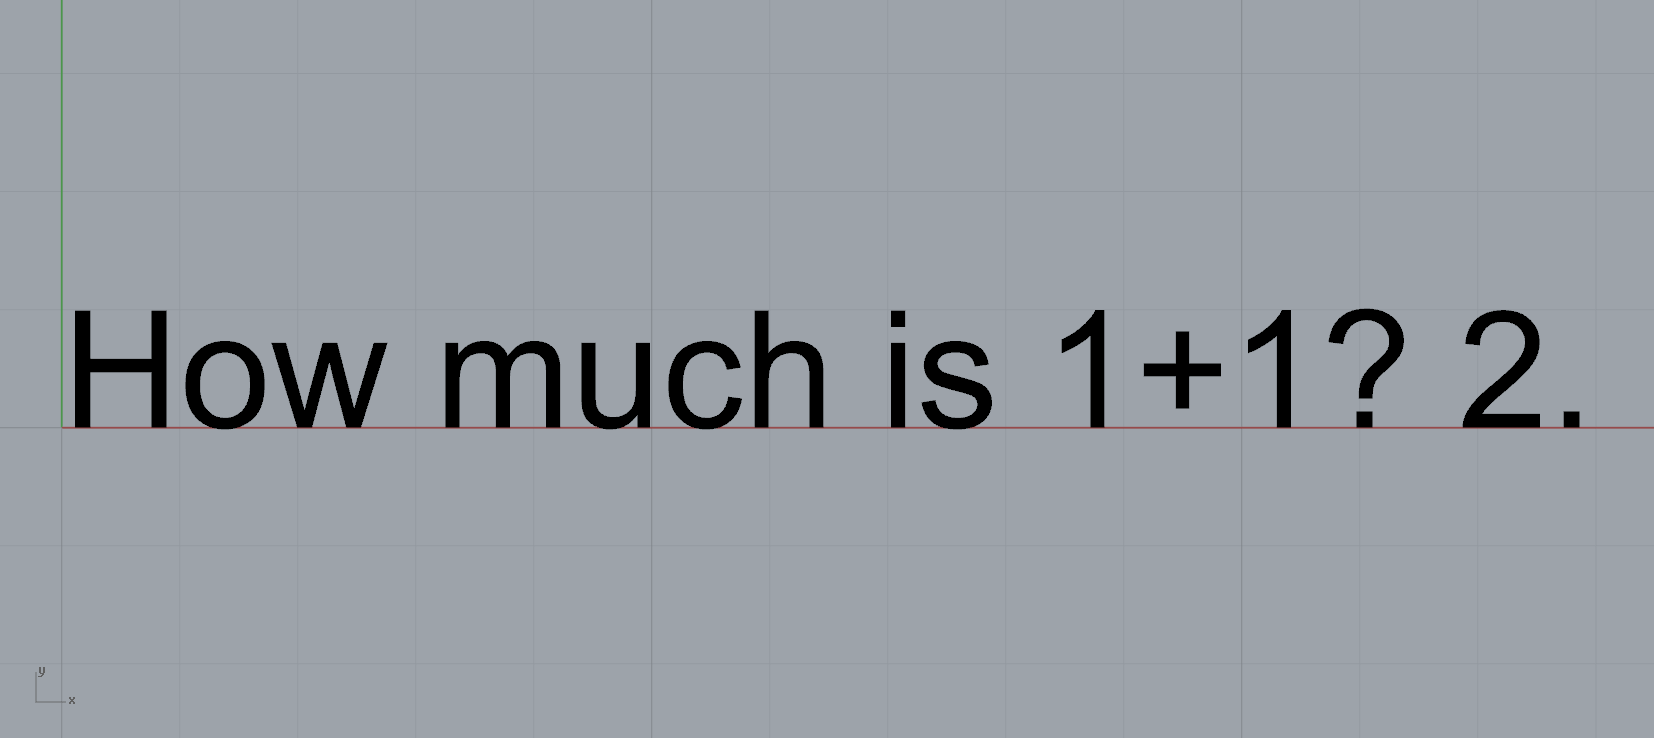
FIGURE 4 | A line of text with a parameter
As you can see in the previous example, the string is placed inside the
format
where we also have a parameter ~a that changes according to the result of evaluating
the piece of code that comes immediately after the string, in this case (+ 1 1).
Let's look at another example. Let's suppose we want to define a function that
creates a line between two points and, placed near the centre of it, writes the dimension
of that line. Creating the line is trivial with the function
line
and for calculating the line length we can use the function
distance
. For writing the line's dimensions we simply need to use the function
text
in conjunction with the form
format
. So, our dim-line will be:
(define (dim-line p1 p2)
  (let ((midpoint (xy (/ (+ (cx p1) (cx p2)) 2)
                      (/ (+ (cy p1) (cy p2)) 2))))
    (line p1 p2)
    (text (format "~a cm" (distance p1 p2))
          (+xy midpoint 0.2 -0.5) 0.4))
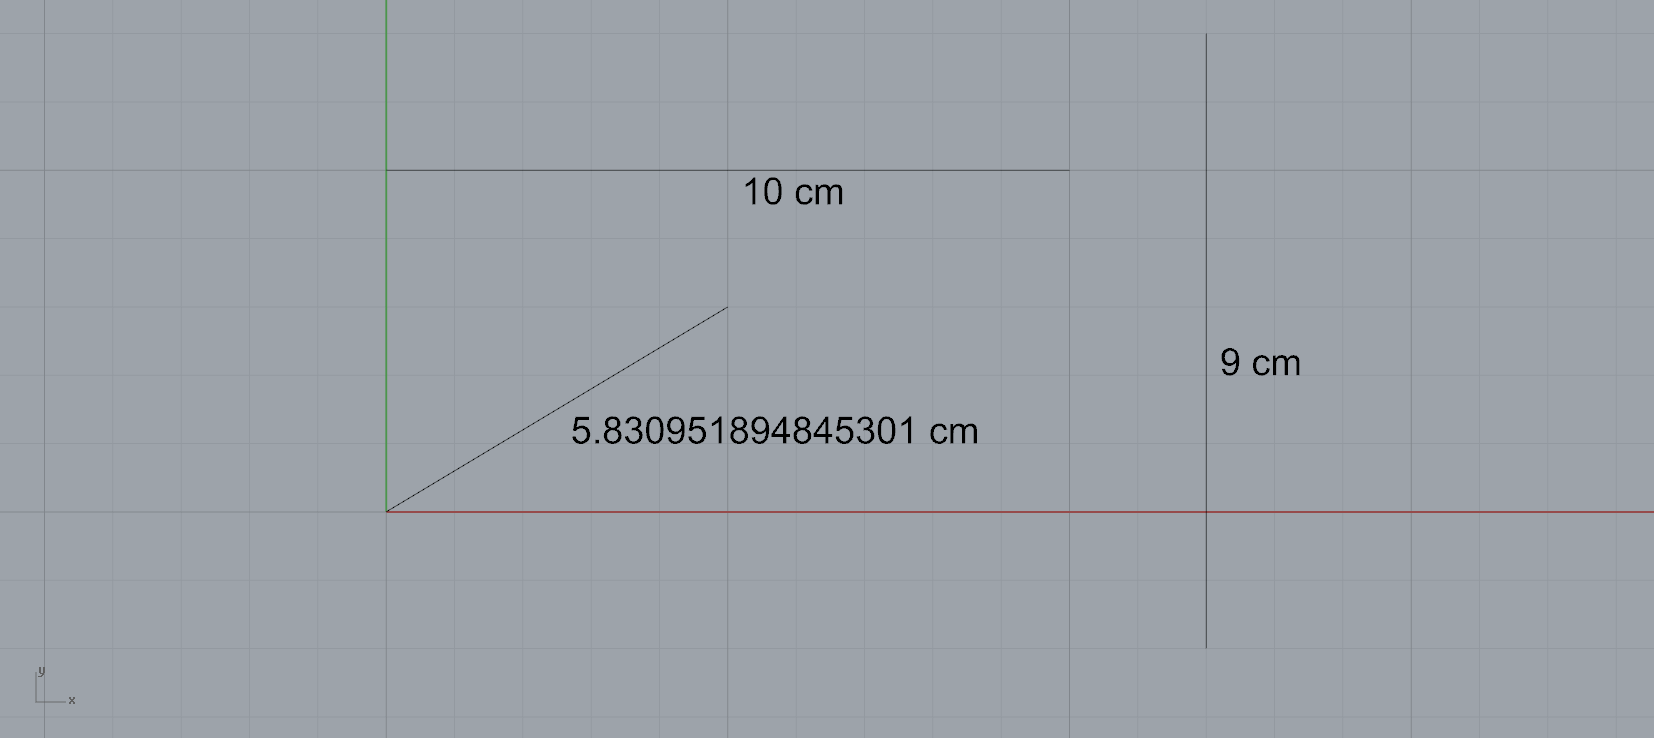
FIGURE 5 | A series of annotated lines
We can also extend this function and tell it to write the coordinates
of both the endpoints. For this however, we will have to have two parameters inside the
format
, one for the points X coordinates an another for the Y coordinate. Apart from ~a
we can add another parameter ~s:
(define (dim-line p1 p2)
  (let ((midpoint (xy (/ (+ (cx p1) (cx p2)) 2)
                      (/ (+ (cy p1) (cy p2)) 2))))
    (line p1 p2)
    (text-centered (format "(~a;~s)" (cx p1) (cy p1))
                   (+xy p1 0.2 -0.5) 0.4)
    (text-centered (format "(~a;~s)" (cx p2) (cy p2))
                   (+xy p2 0.2 -0.5) 0.4)
    (text (format "~a cm" (distance p1 p2))
          (+xy midpoint 0.2 -0.5) 0.4)))
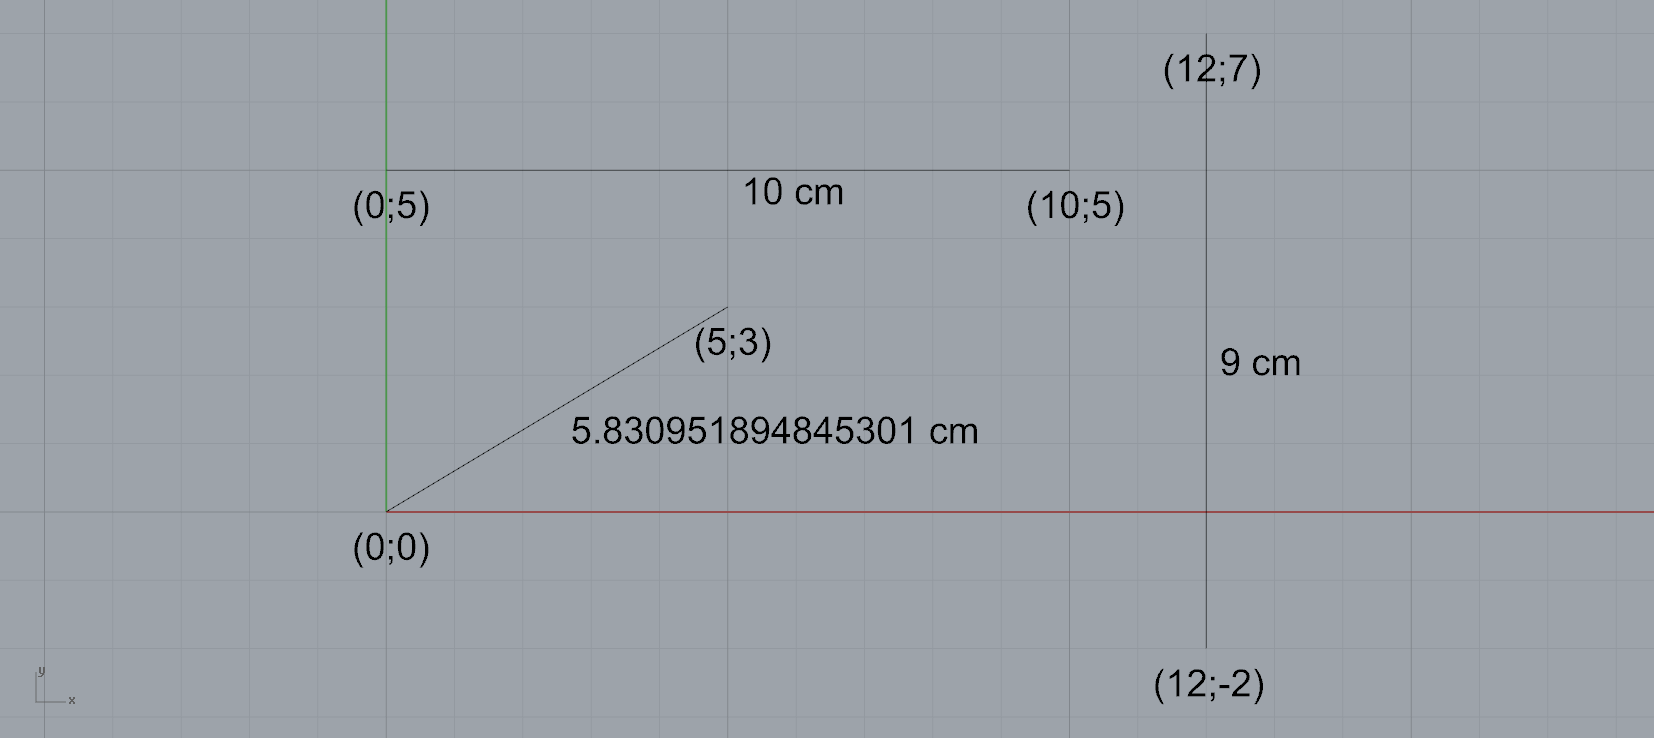
FIGURE 6 | Annotated lines and points
In this tutorial we saw how to use Rosetta to create textual annotations in our drawings, and also how to parametrize the information that shows in those annotations.
Before moving on to the next section of intermediate tutorials we strongly advise you to take some time to practice the concepts that you have been learning, by reading through the miscellaneous tutorials. There you will find several tutorials that are aimed at revising everything we've looked at and are good practice to strengthen your skills.
Top